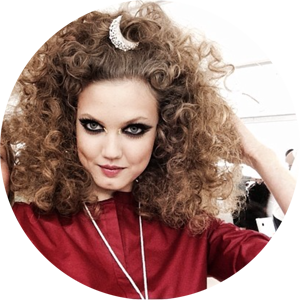
Do you like it? How to get the best out of your selfie.
The perfect selfie: Regram from @lindseywixson
Facciamocene una ragione, Selfie è ormai un vocabolo fatto e finito, tanto da essersi guadagnato il titolo “World of the Year” dell’Oxford Dictionary nel 2013. Quindi, come trarre il meglio da uno scatto autodidatta? Con l’aiuto di Instagram, l’applicazione attorno a cui molte delle nostre vite ruotano. Leggete questo how-to per scattarvi un autoritratto degno di “Like”.
Posizionatevi. Cercate uno sfondo significativo, un muro interessante, un paesaggio particolare, fate voi. Badate solo che l’illuminazione sia decente. Decente, si, non perfetta. Instagram, infatti, grazie ai suoi filtri Amaro, Sierra, Rise, Willow e Walden riesce a salvare anche gli scatti più scuri. Scegliete uno o l’altro secondo il vostro gusto, la differenza sta nelle tonalità e nell’intensità con cui schiariscono la vostra foto.
Fate come le top (models). Inquadratevi tenendo lo smartphone leggermente in alto e… abbassate il mento. Non per niente “chin down!” è la frase più sentita sui set fotografici perché, con questo semplice gesto, il viso viene sfilato e alleggerito.
Mettete a fuoco. Il vostro telefono (di solito) ha un tool per decidere il punto esatto del focus toccando lo schermo. La regola dice che gli occhi devono essere il centro dell’attenzione ma, se avete un rossetto o un hairstyle particolari, nulla vi vieta di fare “tap” su uno di questi. Ora, guardate dritto nell’obiettivo e scattate.
Pensate di aver finito? Ebbene no, siamo solo a meta dell’opera, Instagram, infatti, propone ben diciannove filtri diversi e sceglierli non è semplice. Da escludere a priori sono quelli che tendono all’arancio marrone e quelli che contrastano troppo. Anche se siete degli addicted agli effetti Lomo, questi filtri come Kelvin, Toaster e X-Pro II, tendono a tirare fuori i difetti come imperfezioni cutanee, occhiaie e borse. Non sono quindi i più indicati per un autoritratto, ma se proprio non potete farne a meno, usate Lo-Fi, contrasta i bordi ma tiene il centro del viso più chiaro. Meglio ancora sono poi quelli che tendono a schiarire – come i sopra accennati Amaro, Sierra, Walden, Willow e Rise – e ancora di più Hudson che raffredda il tono della pelle ed è perfetto se nella foto tendete al grigiastro o all’arancio. Per le pelli perfette Brannan è un valido filtro in quanto, schiarendo e contrastando, conferisce un aspetto da bambola. Per non sbagliare provate invece Valencia che, uniformando la pelle, mimetizza le imperfezioni. Per i nostalgici ci sono anche gli effetti in bianco e nero di Inkwell e quelli tendenti al seppia di Earlybird e Sutro.
Una volta scelto il filtro si passa alla sfocatura. Usando l’effetto miniatura (la goccia) potete eliminare con l’effetto blur elementi che non vi piacciono e puntare tutto sul vostro viso. Ricordate che potete aumentare o diminuire il raggio della sfocatura circolare o l’ampiezza di quella lineare muovendo le dita sullo schermo.
Ora, non vi resta che pubblicare il vostro selfie! Do you Like it?
....................................................................................
Let’s face it: selfie is now part of our everyday vocabulary, so much so that last year Oxford Dictionaries named it "Word of the Year". Now, if you are wondering how to shoot the perfect one, just read this quick guide, I’ll explain you how to use Instagram - the app that in the first place started this mania - and how to manage with ease backgrounds, shooting angles, filters, focus and all that pros stuff.
Place Yourself. Whether you are looking for a glamorous wall or a stunning background remember to check the light, it has to be decent. Yes, decent, not perfect. Indeed, Instagram provides five essential filters - Amaro, Sierra, Rise, Willow and Walden - that can save also the darkest shoots. Pick one or the other depending on your taste, the differences are in the resonance and colour intensity.
Act like a top (model). “Chin down!” is the most popular sentence backstage. Indeed, this trick can make your face look thinner and sharper.
Focus. Tap the screen where you want the focus to be. The general rule wants eyes to be the centre of attention but, if you have a stunning lipstick or a particular detail you want to show, tap on it. It will make your selfie even more special. Now, take the picture!
Filters time.
Never use Kelvin, Toaster and X-Pro II: tending towards orange and contrasting too much, they make blemishes, skin imperfections and eye bags stand out. Still, if you are hopelessly attached to the Lomo styles opt for Lo-Fi, it contrasts the sides but it lighten the centre (where your face is supposed to be).
Pick and choose Amaro, Sierra, Rise, Willow and Walden for some smart brightening or opt for Hudson if you are in need to cool the colors down.
You can’t go wrong with Valencia because it evens out the skin tone concealing any imperfection.
If your complexion is flawless use Brannan, you will look like a doll.
Last but not least, nostalgics can choose either the black-and-white Inkwell or Earlybird and Sutro for some sepia bleach out.
Focus or out-of-focus? Pick the drop in the tools menu to blur the background or some not so relevant details. It will centre the attention on your beauty only.
Now, upload your selfie. Do you like it?

